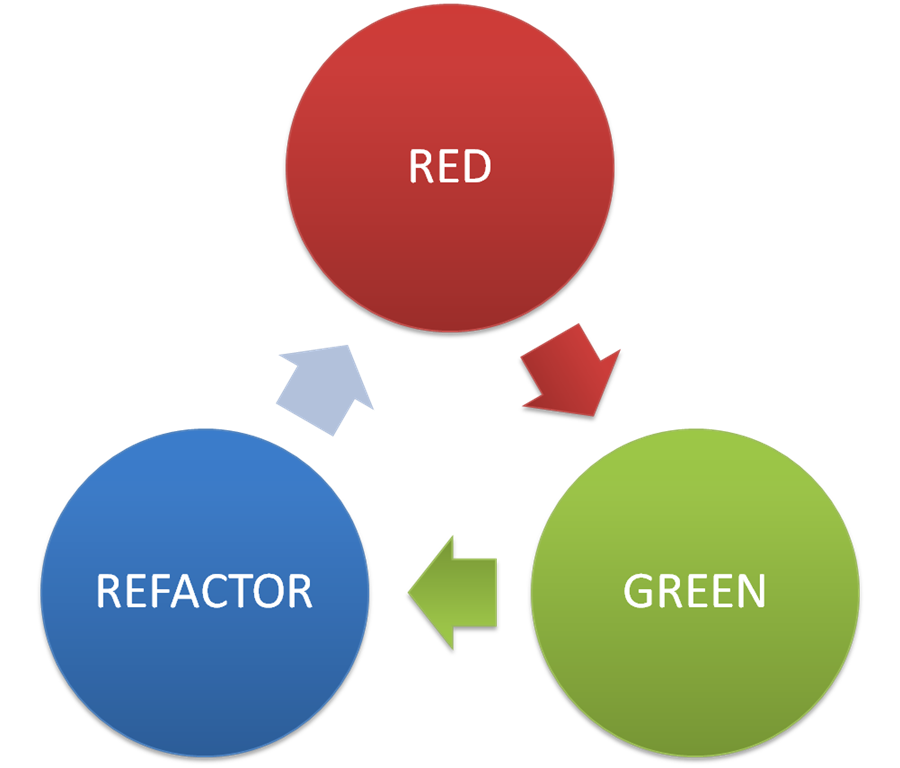
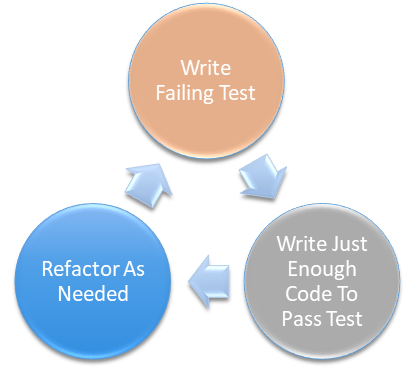
In this tutorial, we will walk through creating a basic JUnit test class in Eclipse just to make sure that our environment is set up properly. We will use Test Driven Development (AKA Test First Development) to ensure that we are writing just enough code to pass our test, and not writing our test to pass our code. This process can be used to test and confirm that you are getting the correct output from your code.
We will create a single Junit test method, review the various dependancies, and confirm that there are 0 errors in your code. Using this process can help to save time & energy that may otherwise be expended on reviewing and re-writing code that doesn’t work.
First we will create a new Java project, then we will create a JUnit test that describes the functionality that we expect from our code. In addition, we will use code generation tools in Eclipse (templates) to create the class and it’s contained methods. Lets get started!
-
On the File menu, select: New > Java Project
-
Name the Project EchoApp, and click Finish
-
Expand the EchoApp project
-
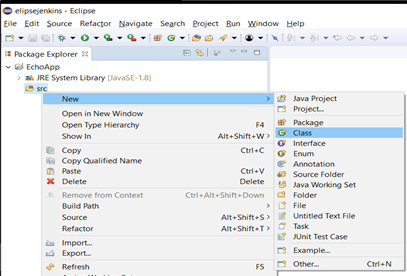
Right click on the src folder
-
On the popup menu select: New > Class
-
Name your new class TestEcho, and accept all defaults by clicking Finish
- Type the following code into your project (Notice the red squigglies beneath some of your annotations)
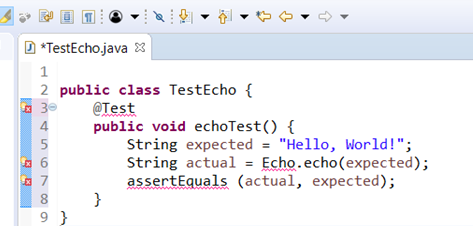
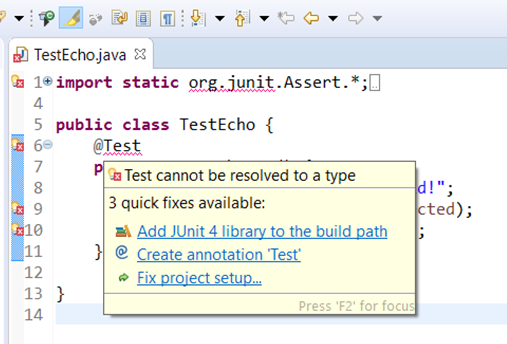
- Hover over the @Test annotation with the red squiggly beneath it
- Select “Add JUnit 4 library to the build path” to make the red squiggly disappear
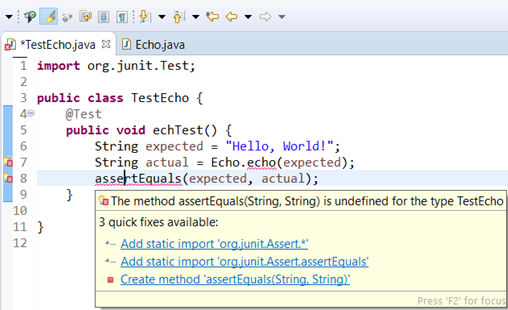
- Hover over the assertEquals annotation
- Select Add static import ‘org.junit.Assert*’ to
add the assert import and make the red squiggly go away
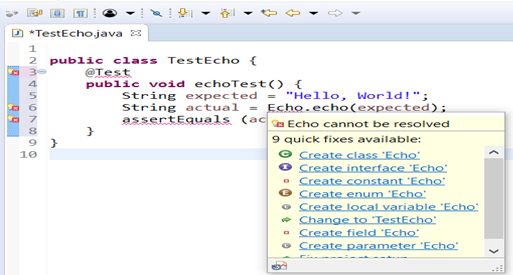
- Hover your mouse over Echo and select Create class ‘Echo’ to create the Echo class and make the red squiggly disappear
- Accept default settings and click Finish
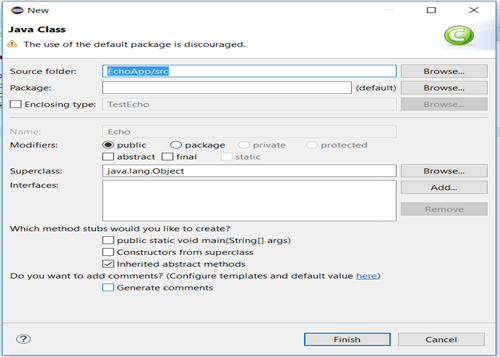
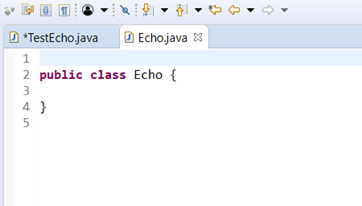
An empty public class has now been created:
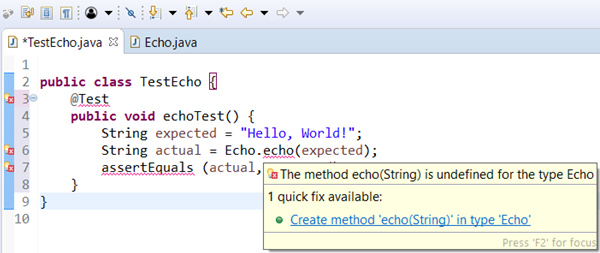
- Click on the TestEcho.java tab to return to your class (Notice that now, a red squiggly is beneath echo)
- Hover over echo, and you will see ‘1 quick fix available:’
- Select Create method ‘echo(String)’ in type ‘Echo’ to create a Public Static String method
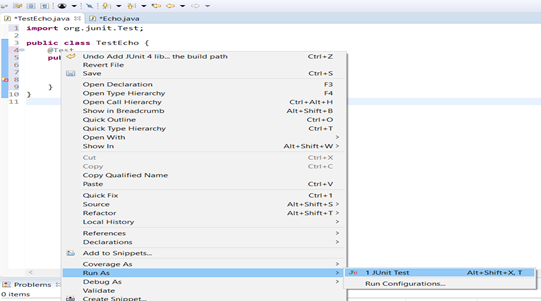
- Right click on the @Test annotation, select Run as > 1 Junit Test
- Eclipse will prompt you to save your TestEcho and your new Echo class
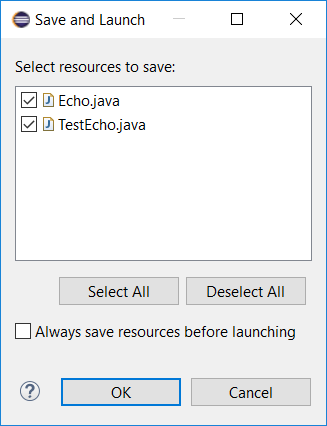
- Click OK to save the files
- Uh oh! It looks like your test has failed L…
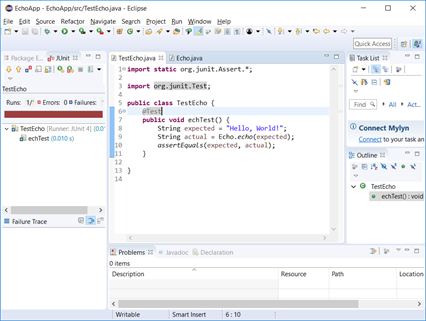
- Click the Echo.java tab (Notice that the default method template has set the return value to null)
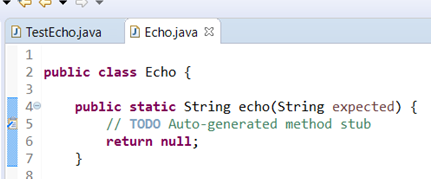
- Change null to expected
- Click the TestEcho.java tab to return to your test class
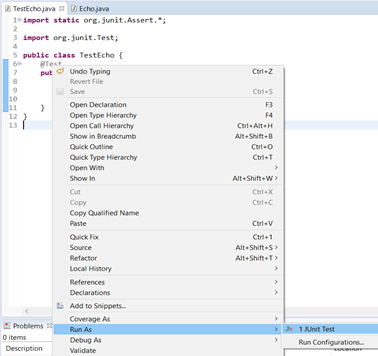
- Right click on the @Test annotation
- Select Run as > 1Junit test
- A dialogue box will appear that asks if you want to save your resources. Select OK
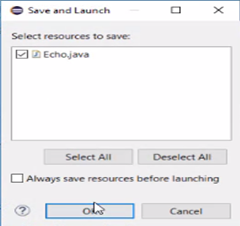
Your test will now run and pass with 0 errors and 0 failures:
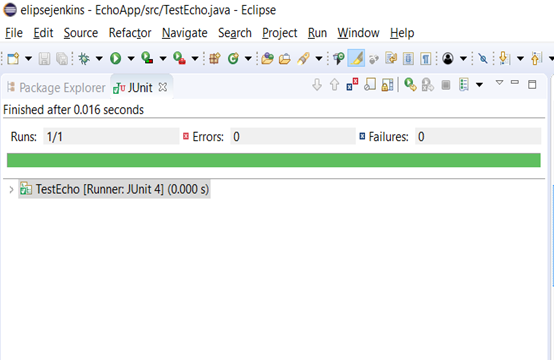
In this demo, we created a single Junit test method, revied the dependancies, and ran the test to confirm that there were 0 errors in our code. .
Resources:
Java Development Kit
Maven
Eclipse
See the post on installing Jenkins to convert this simple Java Project to a Maven Project and build and test with Jenkins.
