Staging Files
As we generate new solution artifacts they need to be added to the repository, integrated with work by other team members and tested to ensure that no defects were introduced by our changes. Until we add the files to the repository they are considered untracked files even though they are present in a folder in the repo. Simply creating files in the folder structure of the local repository is not sufficient.
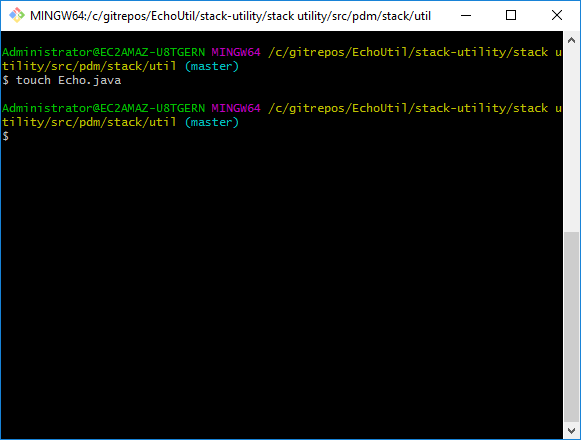
Create Echo.java in local repo folder structure
After creating a new file, we can use git status to check the status of files in the repository’s directory structure. Untracked files will be displayed in red. Red bad Green good!
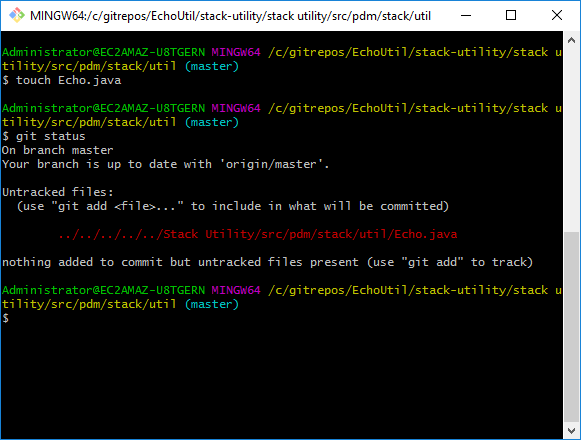
Use git Status to see untracked files
Depending on the number of files we have created we can use git add with various options to track one or more untracked files. If we create a single file (or a short list of files) we can use git add <filename(s)> to Stage a particular file or list of files
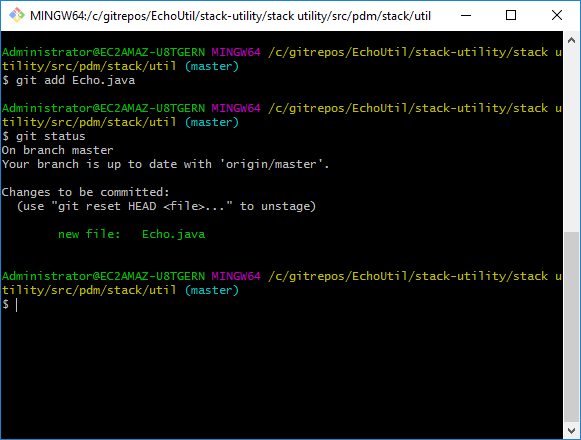
Stage single file or list of files with git add <filename(s)>
If we create multiple files in a single directory we can use git add . to Stage all files in the current directory but not sub directories. We can use git status at any time to determine if there are any untracked files or uncommitted changes in the local repository.
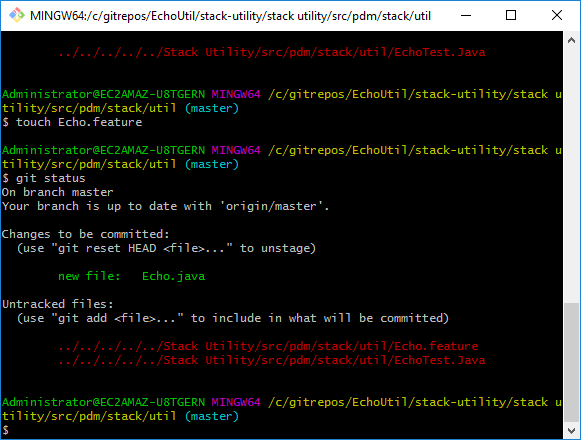
Create multiple untracked files and check status
Once we have determined that there are 2 untracked files and tracked file with a changes to be committed we can use git add . (git add –all) to add all track all new files in the current directory (or all files in current and subdirectories)
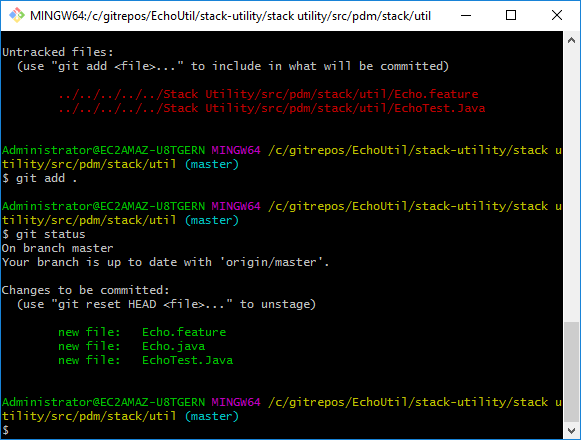
Stage all files in current directory
Git add .
If we create multiple files in multiple subdirectories we can use git add –all to stage all files in the directory tree with a single command
Committing changes to the Local Repository
Once we have created or edited files and Staged the changes then we can commit the changes to the repository. However, if we attempt to commit without authenticating against the repository we will get a warning message
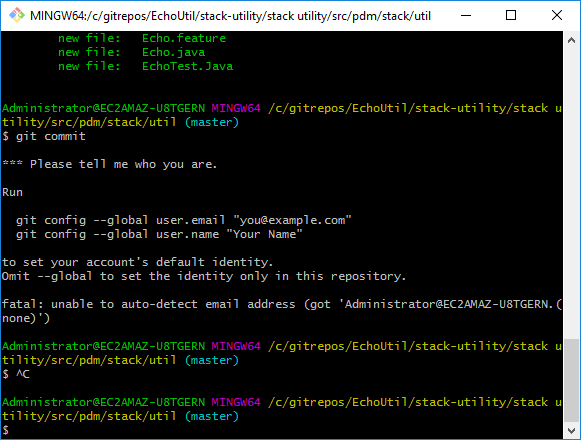
Please tell me who you are
We can add the email and username info using the git config command
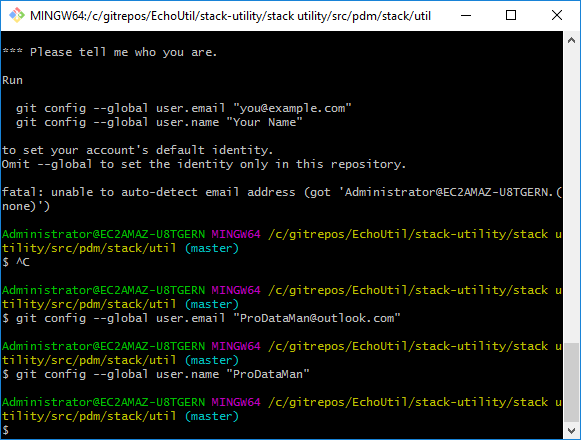
Use git config to add email and user name
Committing changes to the Local Repository
If we attempt to commit without adding a commit message we will be prompted to enter a commit message in the dreaded vim editor as in the image below. If you find yourself in this editor, enter your message then press <esc> to exit edit mode then type : x <enter> to exit the editor
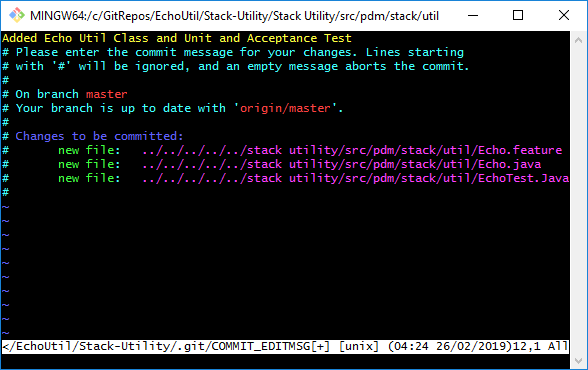
Enter Added Echo Util Class, Unit and Acceptance Tests
Adding a Commit Message
Once we have added our commit message and have pressed <esc> then typed : x <enter> to save and exit the editor we will then see our commit message followed by details about the files committed to the repository as in the image below.
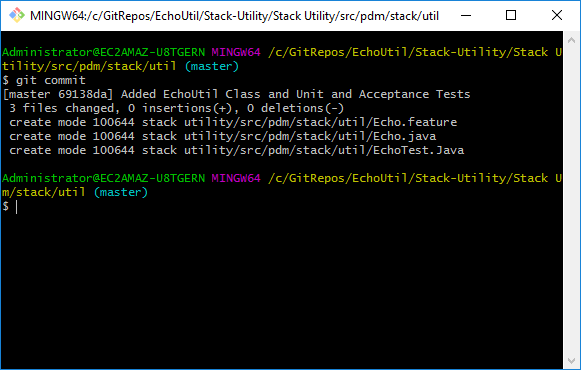
Commit complete
Pushing Changes to a Remote Repository
In order to share our changes with other team members we need to push our changes to a remote repository. With a small team and little to no branching pushing changes to a remote repo is as simple as running git push origin master. This command pushes changes from the current branch in the local repo to the master branch of the remote repo
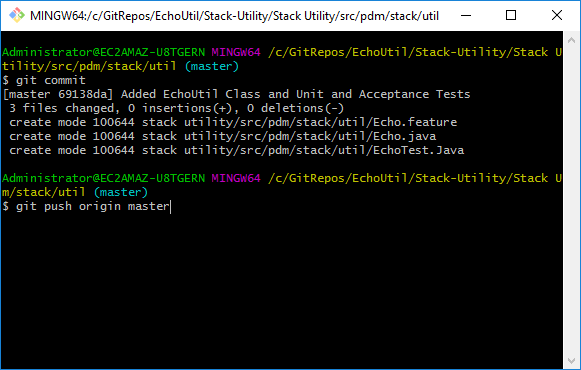
git push origin master
The get push origin master command only works if you cloned your remote repository to the local repository or if you have configured the remote repo in advance. Even if you cloned or configured the remote repo in advance if you are not already logged into the remote repo you will be prompted to log in when you execute git push origin master
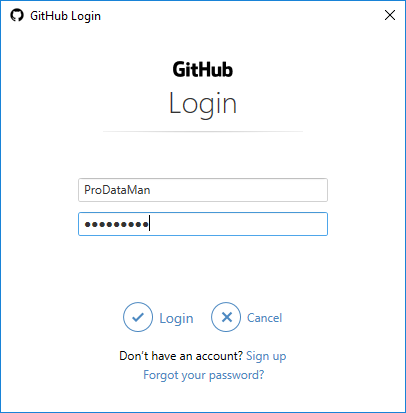
Authenticate to remote repo for push to complete
Once you have authenticated, the commit will complete and a status message will be displayed showing the number of files committed as well as the source and destination branch.
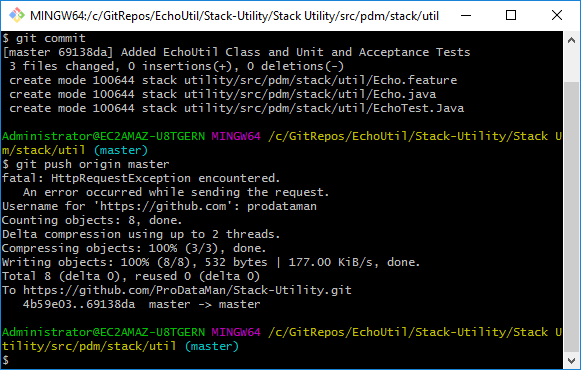
Push complete
In the next post we will clone this remote repo to a new local repo on a different computer pull the changes add a couple of new files commit and push our changes before we move into branching and merging.


Your `vim(1)` commands got emojified!